

Gluten-free bread
There’s a moment every gluten-free baker knows: you lift a fresh loaf from the oven, admire the golden crust, slice into it with anticipation — and reality lands like a dull thud.
Crumbly edges. Gummy center. Dense interior that feels closer to clay than bread.
It’s frustrating. You followed the recipe. You measured carefully. You preheated your oven like a professional.
So why does gluten-free bread sometimes feel like it betrays you?
The truth is simple: gluten-free baking isn’t about swapping flours — it’s about understanding structure, hydration, and time the way chefs do. Traditional wheat bread relies on gluten for elasticity, lift, and crumb. Without gluten, you are building the architecture from scratch — and once you master it, you’ll create loaves that are tall, tender, and fragrant, with a crust that sings when you tap it.
Today, we’re breaking down the five most common mistakes bakers make — and the chef-proven solutions that transform your gluten-free bread into something you’ll proudly slice, toast, and serve.
If you’re brand-new to this world, begin here first: Gluten-Free Flours – A Complete Guide You Need To Know
Let’s save your loaf — beautifully.
Mistake #1: Using a Single Flour Instead of a Balanced Blend
Why It Ruins Bread
Gluten-free bread needs balance: structure, elasticity, moisture retention, and airiness. No single flour provides all of that.
Almond flour makes things rich but heavy.
Rice flour gives lightness but can feel gritty.
Coconut flour drinks water like sand in the desert.
When you rely on just one, your crumb collapses, dries out, or turns dense.
The Fix
Use a chef-formulated blend that mixes grain-based flours, starches, and a binder:
For most bread recipes, aim for:
- 40% rice or sorghum flour (structure + flavor)
- 25% tapioca starch (chew + elasticity)
- 20% potato starch (moisture + lift)
- 10% oat or sorghum (warmth + crumb support)
- 5% psyllium husk powder (the gluten replacer)
Proper blending makes dough cohesive, airy, and sliceable.
Chef’s Tip
Pre-mix flour blends and store them airtight — your future self will thank you.
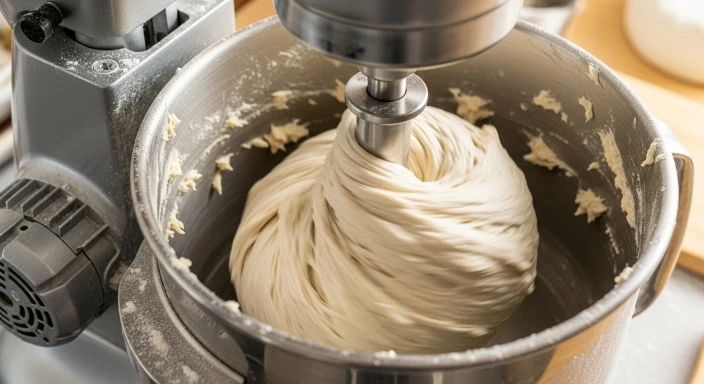
Mistake #2: Treating Gluten-Free Dough Like Wheat Dough
Why It Ruins Bread
If you’re pressing, kneading, shaping, and expecting dough elasticity — gluten-free bread will punish you.
GF bread dough should not feel like dough in your hands.
It isn’t kneaded to develop gluten — there is no gluten to develop.
Instead, the dough should resemble a thick, glossy batter. Heavy kneading breaks the delicate hydration matrix you need.
The Fix
- Mix dough with a paddle attachment for 4–5 minutes
- Don’t knead by hand the way you would wheat bread
- Expect a batter-like consistency, not a firm dough ball
Textures to Aim For
| Style | Correct Texture |
| Sandwich loaf | Smooth, thick batter |
| Artisan boule | Slightly thicker but still scoopable |
| Rolls | Scoopable + glossy |
Chef’s Tip
If you can shape it like wheat dough, it’s too dry — and will bake dense.
Mistake #3: Not Using Enough Hydration
Gluten-free bread
Gluten-free bread
Why It Ruins Bread
Hydration is everything. Water creates steam. Steam expands starches. Expansion lifts bread.
Wheat bread might sit around 60–70% hydration.
Gluten-free dough?
90–110% hydration is normal — sometimes more.
Low hydration = fragile, dry loaves with no lift.
The Fix
Add more water than feels instinctive — and trust the science:
| Bread Style | Ideal Hydration |
| Everyday sandwich loaf | 90–100% |
| Soft rolls | 85–95% |
| Artisan crusty loaf | 100–110% |
Warm water (~105°F) also helps yeast activity.
Chef’s Tip
Let batter rest 10–15 minutes after mixing — it gives flours time to absorb moisture and activate psyllium.
Mistake #4: Skipping Proper Rise & Fermentation Time
Why It Ruins Bread
Gluten-free dough needs time to hydrate, expand, and develop flavor.
Skipping proofing leads to:
- dense crumb
- low rise
- raw interior
- dull flavor
The Fix
Proof once — slowly and carefully:
- 60–75 minutes at warm room temp
or - Overnight cold rise for the best flavor
Dough should increase by ~75% (not necessarily double like wheat).
Chef’s Tip
Letting dough ferment cold enhances aroma, acidity balance, and crumb structure — like artisan bakeries do.
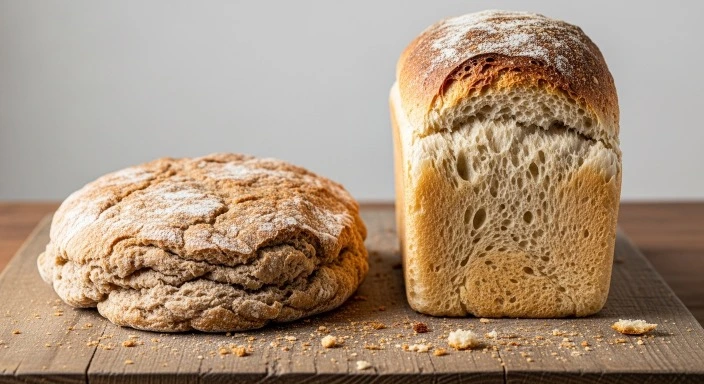
Mistake #5: Cutting Too Soon — Not Letting Bread Cool Completely
Why It Ruins Bread
This mistake ruins more loaves than you think.
Steam needs time to exit. Structure sets during cooling.
Cut too early — and the crumb collapses into gumminess.
The Fix
Let gluten-free bread cool:
- At least 2 hours
- On a wire rack
- Fully uncovered
Trust the process — this is where the magic finishes.
Reference: America’s Test Kitchen: How gluten-free bread sets
Gluten-free bread
Gluten-free bread
Final Thought — Master These, Master Your Loaf
Great gluten-free bread isn’t luck; it’s precision, patience, and understanding your ingredients.
When you stop treating gluten-free baking like wheat baking and start embracing its own rules — you unlock breads that are airy, aromatic, and genuinely joyful to eat.
Your next loaf can be:
- tall
- tender
- sliceable
- satisfying
And it will be — because now you hold the chef-level fundamentals.
Let the dough be wetter. Let it rise longer. Let it cool fully.
And above all — bake again. Every loaf builds skill.
Continue your GF mastery here: How to Make Soft, Fluffy Gluten-Free Bread at Home
Your kitchen is about to smell incredible.