

Tap to flip the pages — scroll for the full recipe below 👇!
Gluten free bread
Full Written Version
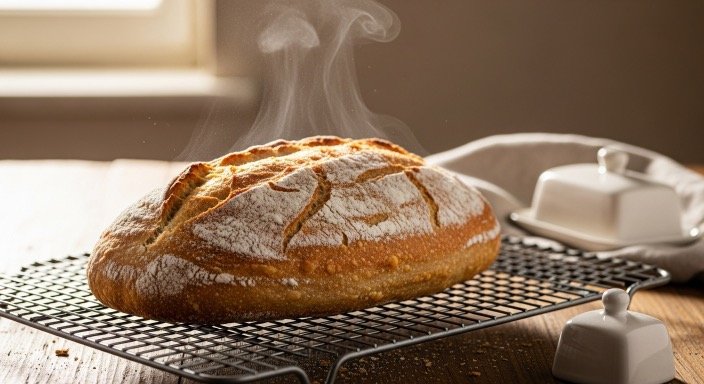
The first slice tells the story. A gentle crackle at the crust. A springy crumb that yields and rebounds. Aroma that’s warm, yeasty, and faintly nutty. This is gluten-free bread at its best—soft, fluffy, and miles away from the dense loaves of a decade ago.
What changed? Chefs began treating gluten-free baking as its own craft, not a compromise. With the right blend of structure-builders (psyllium, gums), smart starches (tapioca, potato), and precise hydration, a home oven can turn out a loaf that’s tender, airy, and fragrant. This guide distills modern, chef-tested techniques so you can bake bread with confidence and polish.
1) Understanding the Science of Gluten-Free Dough
Gluten networks trap gas and create chew in traditional bread. In gluten-free baking, we build an alternative network. Think of it as a moisture-bound matrix that stabilizes air bubbles so the loaf rises tall and bakes tender.
- Psyllium husk powder: Hydrates into a gel that adds stretch and chew, reducing crumbliness.
- Xanthan or guar gum: Adds viscosity and helps suspend gas bubbles.
- Starches (tapioca, potato, corn): Lighten the crumb and promote crisping.
- Protein & flavor flours (sorghum, millet, buckwheat): Support structure and deepen flavor.
2) The Chef’s Flour Blend (Balanced for Lift, Tenderness, and Flavor)
There’s no single magic flour. A strategic blend wins on texture and taste. Mix well and store airtight.
| Flour/Starch | Role | Suggested Ratio |
|---|---|---|
| Brown Rice Flour | Neutral base, mild flavor | 40% |
| Tapioca Starch | Elasticity, lightness, oven spring | 25% |
| Potato Starch | Moisture retention, tenderness | 20% |
| Sorghum Flour | Protein, nutty depth | 10% |
| Psyllium Husk Powder | Binding, chew, sliceable crumb | 5% |
3) Hydration: The Secret Behind the “Fluff”
Gluten-free dough loves water. Aim for 90–100% hydration (water ≈ flour weight). This creates a thick batter rather than a kneadable dough—exactly what we want. Steam generated inside the batter expands during baking and sets into a soft, springy crumb.
Target water temp: ~105°F/40°C. Cold water slows yeast; very hot water risks killing it. For more on hydration, read King Arthur’s guide to hydration.
4) Fermentation for Flavor (Poolish/Preferment Optional)
Soft texture is half the equation; the other half is flavor. A first rise of 60–90 minutes in a warm spot builds aroma and nuance. For deeper complexity, make a poolish 8–12 hours ahead (equal parts water and flour from your blend, a pinch of yeast). It lends delicate tang and caramel notes without sourness.
Dive deeper: How yeast and preferments behave in gluten-free baking.
5) Mixing (Stand Mixer, No Traditional Knead)
Gluten-free dough doesn’t want heavy kneading. Use a stand mixer with paddle attachment and mix 4–5 minutes on medium until smooth, glossy, and thick—like pound-cake batter. If using psyllium, mix an extra minute to fully form the gel.
Texture check: the batter should mound and slowly level—thick but pourable.
6) Proofing: Warm Rise or Overnight Cold Proof
Cover the pan and proof warm (≈80°F/27°C) until the batter rises by about 75–100%—typically 60–75 minutes. For even better flavor and structure, try a cold proof in the refrigerator for 8–12 hours, then finish proofing at room temp before baking.
7) Baking for Lift and Crust
- Oven preheat: 425°F/218°C. Heat a stone or heavy tray inside to mimic deck-oven radiation.
- Steam: Mist the oven walls or place a preheated pan with hot water on a lower rack for the first 10 minutes.
- Cover, then uncover: Bake covered (foil or cloche) 25 minutes; uncover and bake 25–30 more until deep golden.
- Internal temp: 205°F/96°C for a set crumb.
8) Cooling and Setting the Crumb
gluten free bread
gluten free bread
Let the loaf cool on a rack at least 2 hours before slicing. This resting period allows starches to set and moisture to redistribute, preventing gumminess.
Patience pays off: the crumb finishes setting as steam escapes.
9) Elevations: From Basic Loaf to Bakery-Quality
- Infused oil finish: Brush with rosemary or garlic oil just before uncovering.
- Seeds & crunch: Sunflower, sesame, or chia on top for texture and nutrition.
- Enriched crumb: Add 1–2 tbsp milk powder or Greek yogurt for plush tenderness.
- Breakfast swirl: Ribbon in cinnamon-honey butter for subtle sweetness.
10) Troubleshooting (Chef’s Fast Fixes)
| Issue | Likely Cause | Quick Correction |
|---|---|---|
| Dense center | Under-proofed or low hydration | Increase water by 5–10%; extend proof |
| Gummy crumb | Sliced while hot or overhydrated | Cool fully; reduce liquid slightly next bake |
| Crumbly slices | Too little binder | Add 1/2–1 tsp more psyllium/xanthan |
| Pale crust | Oven not hot enough/short bake | Raise temp 10–15°F; bake 5–10 min longer |
11) Sensory Standards: How to Judge a Perfect Loaf
- Crumb: Light, elastic, small-to-medium even cells; springs back when pressed.
- Crust: Thin, crisp, golden to deep amber, not tough.
- Aroma: Clean yeastiness with subtle nuttiness; no raw starch scent.
- Tap test: Hollow sound from the bottom equals airy interior.
12) The Professional’s Perspective
Modern gluten-free bread is its own cuisine, not a workaround. Chefs design for what these flours do best: tapioca’s caramelized stretch, sorghum’s warmth, psyllium’s supple structure. When hydration, fermentation, and heat are aligned, the result is unmistakable—tender slices that toast beautifully, stand up to butter and jam, and make memorable sandwiches.
gluten free bread
Final Thought: From Patience Comes Perfection
Soft, fluffy gluten-free bread isn’t a unicorn; it’s a method. Blend for balance, hydrate generously, proof with intention, and bake with purposeful heat and steam. Give the loaf time to rest, then slice into a crumb that’s plush, fragrant, and downright celebratory.
Discover more gluten-free guides and recipes on EverydayGlutenFree.com — where gourmet meets gluten-free.