

Gluten-free brownies
The moment you press your spoon into a warm brownie, you expect two things: a crisp, crackly top and a chew that lingers—just enough to let flavor settle, rather than disappearing instantly. For many gluten-free bakers, that moment has felt elusive. Dense, dry, gummy textures lingered long after the last bite. But imagine instead: a brownie so profoundly chewy, rich in chocolate, gluten-free by definition and architectural by design. That’s not a compromise. That’s a masterpiece you bake at home.
In this guide I’ll walk you through the chef-level techniques that bring chew into your gluten-free brownies: how to modify flour blends, control moisture and fat ratios, handle chocolate and sugar, and finalize the bake so every square gives you that satisfying chew. Whether you’re baking for family, friends, or just yourself, the texture will tell you you succeeded.
Before diving in, if you’re refining your gluten-free baking foundations, check out our guide to flours: Gluten-Free Flours – A Complete Guide You Need To Know
1. What “Chewy” Really Means in a Gluten-Free Brownie
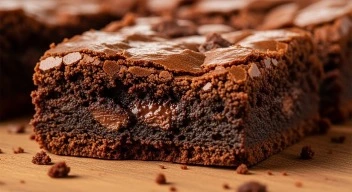
Chewiness doesn’t mean “undercooked” or “sticky.” It means structure. In a perfect bite you’ll feel resistance. Your teeth will sink in, and your jaw will trace an arc of texture before you swallow. A brownie that simply melts is fudgy. One that crumbles is cakey. One that resists, yet yields, is chewy—and that’s the sweet spot.
The science confirms it: one specialist blog identifies three main ingredients to alter for chew—chocolate/fat, sugar, and flour. (Do you want science with that?) Another detailed analysis explains how melted butter with sugar and a shiny crackly top correlate to chewy texture.
In gluten-free baking, structure must be built with precision—since dairy flours, starches, and binders behave differently than wheat.
In upcoming sections we’ll examine each variable: flour blends, fat ratios, sugar & chocolate choices, mixing technique, heat and bake time—all tailored to gluten-free brownies.
2. Choosing the Right Ingredients for Gluten-Free Chew
2.1 Flour Blends & Binders
Gluten provides chew in wheat brownies—not just flavor. Without it, you must create a network of structure using binders, proteins, starches, and fat. Here’s how to build your blend:
- Use a base flour (brown rice, sorghum) for stability and mild flavor.
- Add a light starch (tapioca, potato) to lighten the crumb.
- Include a bind-agent (psyllium husk, xanthan gum) to give elasticity.
For chewy brownies aim for a blend where around 50-60% of the flour component is protein-rich flour and the remainder is starches, with the binder proportion at ~2–3% of total dry weight. The result: brownies that hold shape, yield a tooth-pull, and resist crumbling.
2.2 Fat and Chocolate
Chewiness often comes from the right amount of fat (butter, oil) plus chocolate content. Melting butter and sugar together—with minimal air incorporated—yields a denser, chewier texture.
For gluten-free brownies:
- Melt 200 g unsalted butter.
- Add 150 g chopped dark chocolate (70%).
- Combine with sugar while warm.
That gives flavor depth and fat structure before flour enters the mix.
2.3 Sugar, Eggs, and Moisture
Sugar does more than sweeten—it regulates moisture, helps crust formation, and contributes to texture. Higher sugar ratios with melted butter yield a glossy top and chewy interior. (Seasoned Advice)
Use:
- 275 g granulated sugar
- 3 large eggs + 1 yolk (adds moisture without raising crumb height)
- Pinch sea salt (enhances flavor)
In gluten-free brownies you may reduce the flour/starch component by 10% relative to many recipes—to maintain chew.
2.4 Minimum Add-Ins, Maximum Impact
Keep add-ins simple: chopped chocolate or cocoa nibs, chopped nuts, a swirl of gluten-free caramel. Avoid large volumes of fruit or extraneous mix-ins that can upset structure. If you add caramel or marshmallow bits, fold them gently at the end.
3. Chef’s Step-by-Step Gluten-Free Chewy Brownie Recipe
Gluten-free brownies
Gluten-free brownies
Yield: 8×8 inch pan (16 squares)
Bake time: 25–28 minutes at 350 °F (175 °C)
Ingredients:
- 200 g unsalted butter, cubed
- 150 g dark chocolate (70% cocoa), chopped
- 275 g granulated sugar
- 3 large eggs + 1 egg yolk
- 2 tsp vanilla extract
- ½ tsp fine sea salt
- 120 g gluten-free flour blend (see above)
- 40 g tapioca starch
- 30 g almond flour
- ½ tsp psyllium husk powder (binder)
- Optional: 50 g chopped walnuts or chocolate chips
Instructions:
- Preheat oven to 350 °F (175 °C). Line the baking pan with parchment paper, leaving overhang for easy removal.
- In a heavy saucepan, melt butter on medium heat until just starting to foam. Remove from heat, add chopped chocolate, and stir until smooth.
- Stir in sugar until fully incorporated and glossy.
- In a separate bowl whisk the eggs + yolk with vanilla and salt. Pour the chocolate-butter mix into the eggs while whisking slowly (tempering).
- Sift together the flour blend, tapioca, almond flour, and psyllium. Fold the dry mix into the wet until just combined; stir in optional nuts or chips.
- Pour batter into pan, smooth the surface. Bake 25–28 minutes until the edges look set and the center jiggles slightly when nudged.
- Remove from the oven and let cool in the pan for 15 minutes. Then use the parchment overhang to lift the cake onto a wire rack. Cool completely before slicing into squares (about 1-hour rest).
- Store in an airtight container at room temperature up to 3 days; for longer freshness seal in fridge and bring to room temp before serving.
Chef’s Tip: For extra chew, chill the brownies in the fridge for 1 hour before slicing—the cooling firms fat and enhances texture.
4. Variations to Match Your Sweet Tooth
4.1 Salted Caramel Chewy Brownies
Fold in ½ cup of homemade gluten-free caramel sauce (see: How to Make Gluten-Free Caramel Sauce) right before baking. After cooling and slicing, drizzle more caramel and sprinkle flaky sea salt.
4.2 Peanut Butter Swirl Brownies
Drop tablespoons of smooth peanut butter atop batter, swirl with a skewer. Bake at the same time. The peanut butter swirl gives richness and chew with a crunchy rind.
4.3 Espresso Chocolate Chewy Brownies
Add 1 tsp instant espresso powder to batter. Replace 50 g sugar with 30 g sugar + 20 g maple syrup for deeper flavor. Bake at the same time—espresso enhances chocolate and chew.
5. Technique Mastery: Baking Methods That Elevate Texture
5.1 Melt Instead of Cream
Avoid creaming butter + sugar in chewy brownies. Instead, melt them together. That minimizes incorporated air and results in dense chew rather than airy cake.
5.2 Control Temperature & Timing
Bake at 350 °F (175 °C). Remove when the center still jiggles—carry-over heat sets it further. Internal temp ~200 °F (93 °C) yields chewy perfection.
5.3 Use Dark Round Edges
Edges in the pan often become chewiest. Use a square or rectangle pan so you maximize “edge” squares. Some bakers even bake in slate pans for extra heat migration.
5.4 Cooling Matters
Let the brownie cool undisturbed. The fat and chocolate set, the structure firms, and cutting too early ruins chew. One binder forum explains: “Cook even slightly under and test for sticky crumbs—not raw batter.” (Seasoned Advice)
6. Common Gluten-Free Brownie Mistakes (and How to Fix Them)
Gluten-free brownies
Gluten-free brownies
| Mistake | Result | Fix |
| Too much flour/starch | Dry, crumbly texture | Reduce dry mix by 5-10% and increase fat/liquid slightly |
| Overmixing batter | Tough crumb | Fold dry ingredients gently just until combined |
| Overbaking | Loss of chew, dry interior | Bake until slight jiggle remains; resting will finish it |
| Too low fat content | Flat, lifeless brownies | Ensure at least 30-35% of dry weight is from fat (butter/oil) |
| Cold baking pan | Uneven bake, under-set center | Pre-heat pan in oven for 3–4 minutes or use lined room-temp pan |
Gluten-free brownies
7. Flavor & Serving Ideas That Make These Brownies Shine
- Serve warm with scoop of vanilla bean ice cream and drizzle gluten-free caramel sauce.
- Dust with cocoa powder and sea salt for an elevated afternoon treat.
- Slice into bars, wrap individually, and freeze for later indulgence.
- Create brownie sandwiches: two brownie squares with peanut butter-banana filling.
Each method highlights chewiness—because the longer your teeth stay engaged, the more flavor you experience.
8. Storage, Cut & Share Tips for Gluten-Free Brownies
- Use a parchment-lined pan with overhang for easy removal and clean edges.
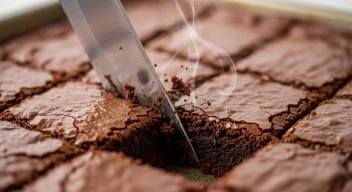
- for clean squares, warm a serrated knife under hot water between cuts.
- Store at room temperature in an airtight container for up to 3 days; refrigerate for up to 1 week. Bring to room temp before serving for best texture.
- Freeze individual squares on the tray, then transfer to a zip bag for up to 3 months; thaw at room temperature.
The Takeaway — Chew, Smile, Repeat
When you master these techniques and respect your gluten-free ingredients, brownies stop being “just okay” and start becoming destination desserts. That crackly top, that chew you feel between your teeth—they matter. They tell you the bake was right, the mix balanced, the timing perfect.
Bake with intention. Follow your instincts. And when you take that first bite, you’ll know you didn’t settle for gluten-free—you celebrated it.
Because when brownies are this chewy, this rich, this purposeful—they’re not just dessert. They’re a triumph.